Showing posts with label Design. Show all posts

Sunday, April 3, 2016

Coastal Living


Do you love this look? 
I just finished shopping for you on my Kabuni page, all you have to do is visit & purchase the items you love to give your space a 'Coastal' vibe. 

Get the app here:
www.kabuni.com

Find me by entering my email address:
DesignsbyRhonda@rocketmail.com

And don't forget to download my app:
Designs by Rhonda in the apple app store. 

Friday, March 18, 2016

Hello kabuni!

I am super excited and happy to share with you my new relationship with kabuni!

You are probably wondering "What is kabuni?"

Kabuni is an app filled with a community of artists, artisans and designers working together to create better homes for everyone.  They live by their motto "We champion great design!"


"kabuni made my heart skip a beat when I heard that they give back to communities, OUR COMMUNITIES, by helping the homeless live a beautiful life too!"


It touches my heart that kabuni is working to reduce homelessness in our communities. 
Their global movement starts with you.  

April 1st You can purchase items curated from all the kabuni designers for your spaces.

Knowing that, with every purchase, You are making a difference in the life of another makes the item a LOT a bit sweeter :)  Imagine; every time you sit down in your new chair, somebody less fortunate is doing the same.  I don't know about you, but that just makes me smile!

I am so happy and proud to represent kabuni as an ambassador and I look forward to connecting with you on their app.  You can find me by searching: Designs by Rhonda  


Wednesday, December 23, 2015

Holiday Home Tour

My Home for Christmas 2015
          🐚A Condo by the Sea🐚
Tidings of comfort & Joy!
Warm Fuzzies!
Love...peace...joy...
My furry baby!
Salty Kisses & Starfish Wishes. 

And always, Wishes for Peace on Earth!

Happy Holidays!

Wednesday, August 14, 2013

What is your Home Theme Song?

Imagine, if every time you walk through your front door, a theme song begins to play that coincides with your design style. 

If your home had a Theme Song, What would it be?


Sunday, July 14, 2013

Art Inspired Design

Recently I was asked to design a master suite around a poster. 
I was excited about the challenge & got straight to work. 

Here's what I came up with:
Have you ever loved a piece of art or a beautiful piece of furniture but it just didn't go with everything else in your space?
Anything is possible!
An Interior Designer is trained in color, space planning & has access to all the tools to get the job done. 
Is it time for you to contact a Designer?
What's keeping you from making the call?

I look forward to hearing your thoughts & answering any questions you may have. 

Blessings,
Rhonda

Saturday, May 25, 2013

Happy Memorial Day!

Wishing you a wonderful weekend creating beautiful memories with your loved ones!
Do you celebrate family traditions on this holiday?
Please share in the comments below

Friday, December 28, 2012

2013 Design Forcast

Make your home a showstopper in the New Year by trying out this design trend, posted by my friends at Interior Collective, 
when you follow the link below:


I am pleased to share my recent addition.
I guess I am spot on for 2013!


I hope you love their post as much as I did!

Happy reading!

Tuesday, December 4, 2012

Pinterest + Camera = Holiday Fun!

Pin of the Day:

Why not add a little whimsy to your holiday party this year?!

With Photo Props!

Whether you are with family or friends, this inexpensive idea is so easy it will have everybody begging for more!

Follow me on Pinterest for more wonderful holiday ideas!

Friday, November 16, 2012

It's beginning to look a lot like Christmas


FRONT DOOR FRIDAY!

DIY Wreath

 Here is my latest wreath, I created for my sister for her birthday.

I purchased everything at Michael's. 
Total cost after sales & using my 20% off (entire purchase) coupon is about $25.00!

I know she will love this little elf greeting her at her entry this holiday Season!

It's so easy to create. For instructions, check out my tutorial post from my Halloween wreath
Here's the link:  DIY Wreath


By the way, did you know that Michael's has an app for your phone? It's free and it puts all your coupons at your fingertips!
Just show your digital coupon at the register & the associate can scan it right off your phone.
How cool is that?!


You can find my wreath creations & more on my Pinterest "Wreaths" Board. 


Friday, November 2, 2012

Holiday Advertising

The Holiday Season is fast approaching.

Are you excited to decorate your home for the holidays?

Stay tuned for some great ideas I've got coming your way to wow your guests.

I Just posted my advertisement, what do you think?

Friday, October 5, 2012

Front Door Friday - Bewitched

Bewitching Wreaths for Halloween! 

 Where I live, I am limited as to how much fun goes on outside my front door.   I am only allowed to hang a wreath and have a front door mat. 

But, I want to make an impression! 

I searched the stores and couldn't find anything that would "wow" my guests.   So, I hopped on the Internet highway and searched.  Boy did I find some wonderful ones!  Of course,  The one I wanted is not available until October 2013... 

So,  I went to my local craft store and purchased some goodies to make my own.  

Here it is Completed:
 Want to make one for yourself?  
Here's my quick DIY tips:

WHAT TO PURCHASE:

These supplies cost me around $50.00 which is the minimum you would pay for a wreath like this.  Good news, if you buy 2 wreaths, 2 hats & 2 Spiders, you will have enough materials to make 2 wreaths! Woo Hoo!


1 - Wreath
1 - Sm. Witch Hat
1 - Pkg. Glitter Balls
1 - Glitter Spider
3 - Wired Ribbon in varied colors & widths
1 - roll of colored mesh in width of your choice 

STEP ONE:
 Prepare the wreath by opening up all of the branches inward and outward, front and back.
Then pinch the mesh end and twist the branches around it tightly to give yourself a secure start 

 STEP 2:
Pinch the mesh and gather, creating a poof.
 Secure the "pinched poof" between two branches by twisting them tight in place.


 When you reach the end, cut the mesh and secure the end under the final poof.
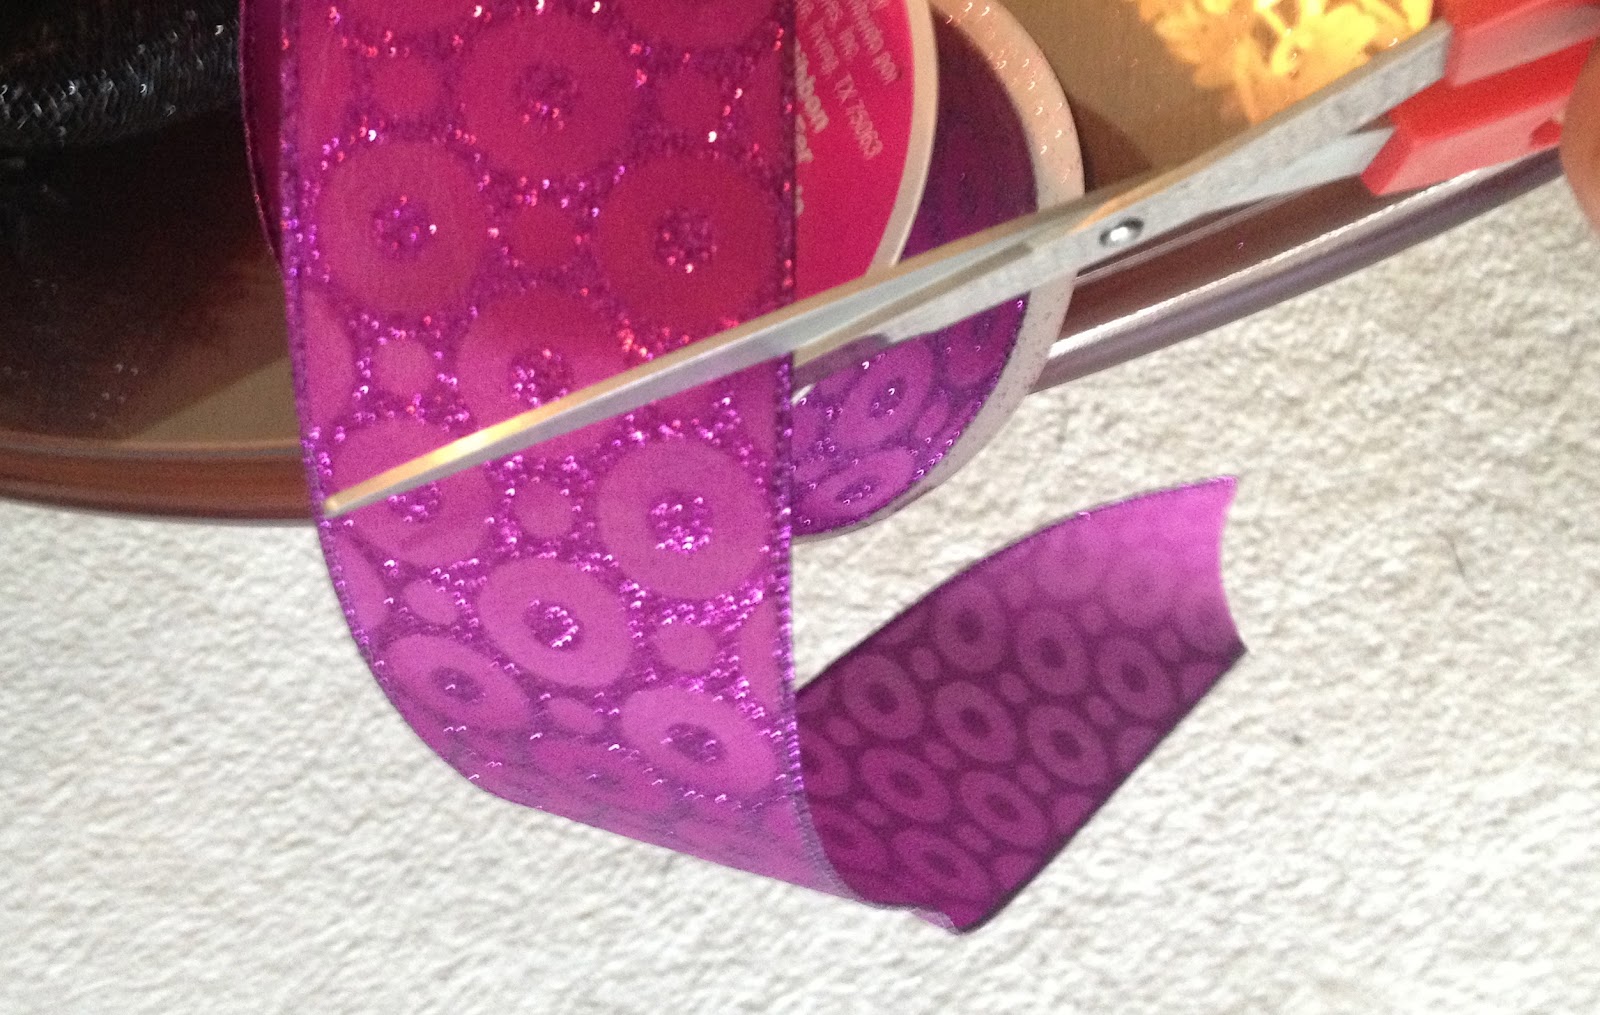
 STEP 3:
Cut 5 strips of your widest ribbon choice into 12"-18" strips

 STEP 4:
Fold the ends of each strip in half and cut diagonally to create chevron shaped ends
 
  
 STEP 5:
Using the same pinch technique as before, pinch the ribbon in the center and secure between the branches with a twist.  Equally spacing them apart around the wreath.
 STEP 6:
Using your medium width ribbon, start under the mesh and secure by 
pinching the end of the ribbon and twisting the branches.  
Then, randomly create loops (similar to the poof technique) and secure all the way around the wreath.
 STEP 7:
Using your final ribbon choice, cut 4- 12" strips, 
cut chevron ends and fold each end across the center creating a bow shape.
Secure to wreath by pinching and twisting.
place them opposite each other equal distance apart.
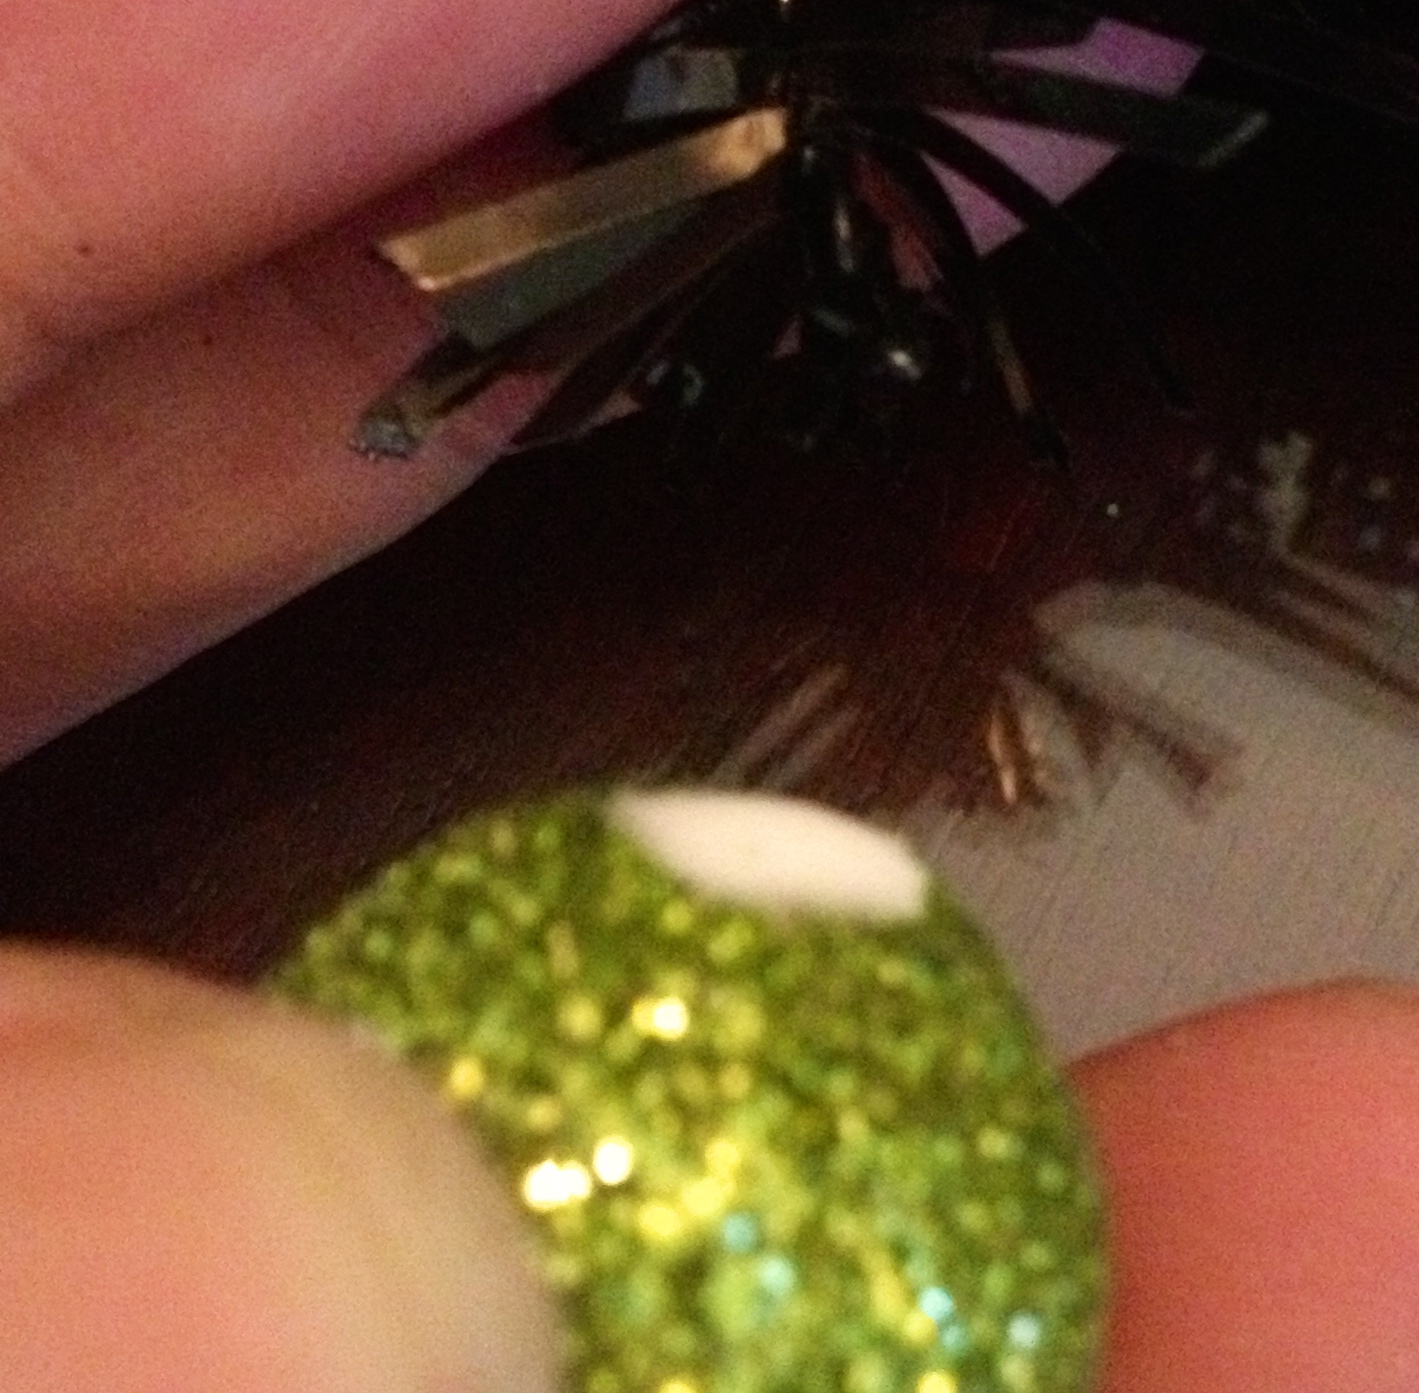
 STEP 8:
Using a pencil, poke a hole into the center of your glitter ball
place a little dab of glue into the hole 
then poke onto the end of a branch.
 Place the balls, randomly around the branches, inside and outside of the wreath.  
Place them in clusters with large medium and small balls in different colors.
Get as crazy as you like & have fun!

LASTLY:
Secure your glitter spider and witch hat, make sure your ribbons are curled perfectly
 and you are done!
when finished, your wreath should look similar to this:

I hope you liked my tutorial.  

I would love to see your creative creations!


WANT MORE INSPIRATION?

Here are some of my favorite finds from the Internet that helped me 

get my creative juices flowing


For more Halloween Inspirations:

Follow Me on Pinterest